Tiling a Kitchen Splashback: Simple DIY Guide for Beginners
DIY Tips – Step-by-Step Instructions for a Professional Finish

1. 🛒 Shopping list.
Materials:
Tiles (+10% extra for cuts and mistakes)
S1 adhesive & bucket
Contrasting grout
Surface primer & roller
Kitchen mould resistant sealant(grout colour)
Tools:
6 mm trowel
Grout float
Wet saw with diamond blade
600 mm spirit level
Measuring tape
2 mm spacers

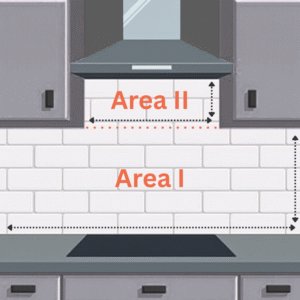
2. How many Tiles Will I need?
DIY Tip
Always buy 10-15% extra tiles to allow for cuts, breakages, and future repairs, also depending on your skill level with cutting tiles.
3. Preparing the Wall.

Level Check:
Use spirit level to check if the wall is flat
If not flat (we talking >3 – 5 mm large surface depressions), then you can either buy a ready-mixed bag of render and add water, or mix your own using sand and cement and level it, make the wall nice and flat
Clean the Wall:
Remove any grease and dust from the surface
Prime it:
- Mix all surface primer as described on the product label
- Spread it using paint roller
- Wait min 30 min for it to dry, multiple coats could be applied
DIY Tip
Before flattening your wall, prime the surface too or gently water it with wet sponge depending on the surface and material used.
4. Plan the Layout.
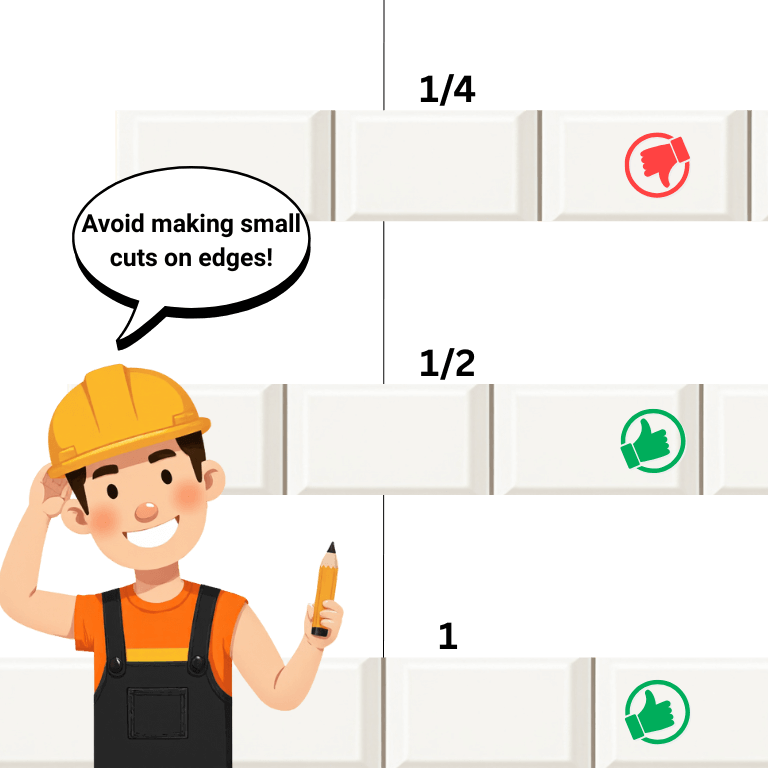
Before you start fixing tiles, take the time to plan your layout carefully. Why? Planning ensures that your work will be symmetrical, appealing to an eye, reduces amount of work in cuts that you will have to do and overall more professional look.
Measure and Mark:
find horizontal centre point use a measuring tape and mark it
draw the centre line
Plan Tile Layout:
Plan the layout of the tiles from the bottom of the centre line, to see if you will come across small and difficult cuts on the end of the splashback that don’t look good (see the infographic).
DIY Tip
Don’t ever skip layout planning.
5. Apply Adhesive & Start Tiling.
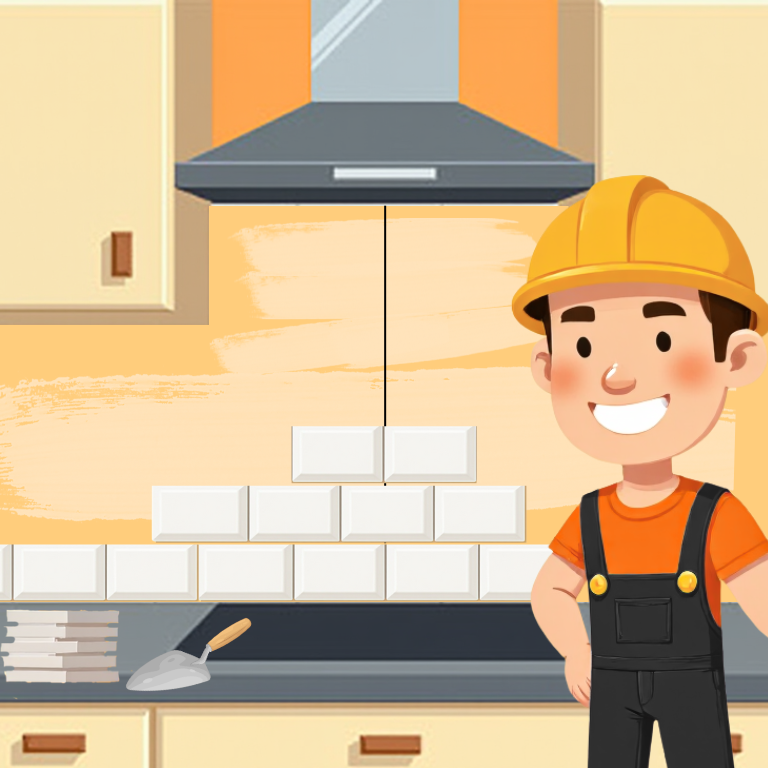
Now that your layout is marked and planned, it’s time to fix the tiles in place.
Mix the Adhesive:
Use S1 adhesive with small amounts of water (use trowel to mix or a drill with mixing paddle for quicker results)
S1 is slow drying and it will allow 1.5 – 2 h of work.
Spread Adhesive:
Spread adhesive to the wall, after use 6mm trowel side to create even 6mm ridges across the wall
Place the tiles:
- Begin with your first full row just above the worktop
- Press each tile gently into the adhesive(you don’t need to put adhesive on the back of small tiles)
- Insert 2 mm spacers between tiles for even joints
- Use your spirit level to ensure each row of tiles is perfectly straight and flat
- Cut the tiles with wet saw or tile cutter when needed.
- Make sure all spacers are removed before the end of the day!
DIY Tip
When spreading adhesive hold the trowel at a 45-degree angle to create consistent ridges. Don't forget any of the spacers between the tiles! Keep your working area and hands clean from adhesive.
6. Grouting and cleaning.
Once the adhesive has fully set, it’s time to grout your tiles.
Grouting:
Clean the tiles from extra adhesive
Joints that are blocked with adhesive have to be cleaned and opened before grouting(use old toothbrush, grout rake or knife)
Mix the grout with water(follow packet instructions), avoid making it too runny – should hold on the grout float without dripping
Apply the grout with grout float(focus on filling the joints and avoid putting it on tiles)
Cleaning:
After about 10–15 minutes, lightly wipe the tiles with a sponge to remove excess grout. Do it gently. Repeat the process until you will clean all of the smearing from the tiles.
DIY Tip
Apply a thin bead of mould resistant kitchen sealant along the bottom edge (where tiles meet the worktop), and smooth it neatly with your finger or a sealant tool for a watertight finish.
Happy Tiling!

Frequently Asked Questions — Kitchen Splashback Tiling
What’s the best tile size for a kitchen splashback?
For most kitchens, metro or subway tiles (20×10 cm or 15×7.5 cm or 30×10 cm) work just fine. I would not recommend using large format tiles for kitchen splashback.
Can I tile directly onto painted or plasterboard walls?
I would try to remove the paint. Also, in most cases I would recommend clean the surface thoroughly, and apply a primer before tiling.
Do I need to remove old tiles before installing new ones?
Ideally yes. Why? Tiling splashback tiles over old splashback will add weight to the wall, tiles will stick out more. Also, you never know if the first layer of tiles is firmly fixed in the first place.
Always remove glass splashback – tile on tile for this surface don’t work very well.
But if you want you can but you need to clean and degrease the surface, scar it with sandpaper. Use proper primer and adhesive for this type of job.
How high should a kitchen splashback be?
Between 40 cm and 70 cm high, depending on the height of the cupboards
What’s the best adhesive for kitchen splashbacks?
Flexible S1 tile adhesive gives you 1.5-2 hours of tiling. S1 can have some wiggle room when it comes to wall expansions. Check my adhesive guide for more info.
Should I use white or grey grout?
White grout: clean and bright, perfect for classic subway tiles.
Grey or contrasting grout: hides stains better and adds a modern, defined pattern. Exacerbates imperfections and tiling mistakes on white tiles.
Make sure your sealant matches your grout.
Do I need to seal my grout or tiles?
Most ceramic or porcelain tiles don’t need sealing, but porous or natural – Yes. It will helps prevent grease and stains.
How long before I can use the kitchen after tiling?
24 hours after grouting will give plenty of time to the grout to dry.
What’s the easiest pattern for beginners?
Easy: horizontal brick pattern, stacked (straight)
Medium: herringbone pattern (a lot of cuts and planning)
Hard: Mosaic – when you use different colours, sizes, and patterns at the same time
How do I stop tiles from sliding down the wall?
Take on the project in stages and use battens to screw the peace of wood to the wall. Make sure you are using long level and the batten is perfectly straight before tiling on top of it.
How much does it cost to tile a kitchen splashback in the UK?
DIY costs are typically £140–£210 for simple tiling tools and materials (excluding tiles).
If hiring a tiler, expect £150–£300 labour or more depending on the size, pattern difficulty, cuts needed, and how flat is your wall in the first place.
Need a Quote?
Professional tiling services in — Tamworth, Lichfield, Sutton Coldfield, Nuneaton. New kitchens splashbacks, bathrooms & floor.
Friendly advice and no-obligation quotes.

